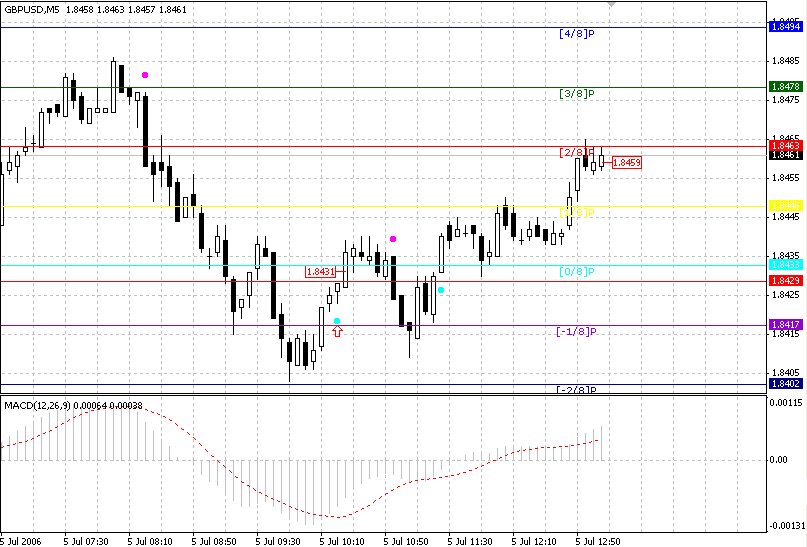
M1 Exit - Close 1.8459

Should follow M5 exit instead?

Somehow for this trade, both exit strategies appear to yield the same result.
Meanwhile...
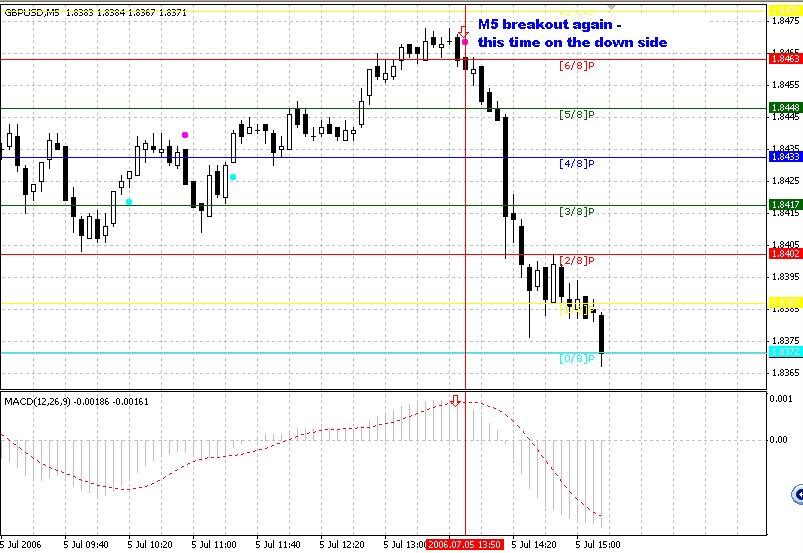
Soon after my exit, M5 breakout again and this time on the down side. The move is so fast & furious and totally caught me by surprise during my lunch break. I have no time to respond. Otherwise...the result could be spectacular (a 100-pip move)!
No comments:
Post a Comment